
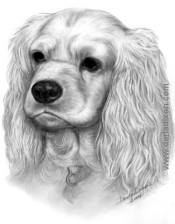
How to draw hair using graphite pencil - or at least, this is how I do it. I taught this to myself by experimenting. You can usually do this same technique for human hair or pet fur.
Start by using a heavy enough paper. Regular typing paper or the student grade drawing paper isn't very good for this - you want a Bristol paper, at least 2 ply, so it can hold up with the erasing technique.
Looking at the photo or the person - look for the darkest areas of the hair. Try not to obsess over the fact that it's hair, if that intimidates you. Try to ignore that it's hair, and just focus your eyes on what is dark and what parts are light. I draw in the darkest areas first, then use the side of the pencil to fill in the rest of it. If you have trouble seeing the dark and light areas, then try turning your reference photo sideways or upside down. Look for shapes in the hair that are dark. Just copy those shapes. If you are drawing from a live model, they don't like being turned upside down or sideways, so I don't recommend that. :)
On top of that, draw in the lines - not too heavy, use flowing movements, following the lines of the hair in the reference photo (or the live sitting, whichever the case). Don't feel pressure to match every line exactly, you just want to get the feel and direction of the hairs going at this point.
Use kneaded rubber eraser to bring out the large areas that will appear the lightest. Don't go too rough with the eraser or the paper will get too rubbed. If you look closely at the person or the reference photograph, you will see there is a curved band of light on the hair - you want to portray this so the hair will look more realistic and the head shape will become apparent.
Blend to soften, using facial tissue (the kind without lotion added), or chamois.
Then use a Pentel Click Eraser (I either cut or break off the tip of it to create a fine edge of eraser I can use). Use this fine edge for the fine highlights in the hair, drawing down and away from the light area made with the kneaded rubber eraser previously.
I use the erasers in a similar fashion as I use the pencil...use soft flowing movements, don't be too straight or apply too much pressure...have a light touch. Draw with the eraser.
After all this erasing, I spend time putting the hairs back in! If you notice the areas where you have erased, there will still be a hint of hair lines. Go over that (gently now, gently!) with mechanical pencil. Let a few 'stray' hairs fly...to add to realism. Think about it...how often is real hair perfect? You don't want it to look like helmet hair, you want it to look realistic.
Most importantly, keep working at this and don't give up.
Every artist will develop his or her own style, but these are just some ideas on how you can realistically draw hair using pencil.
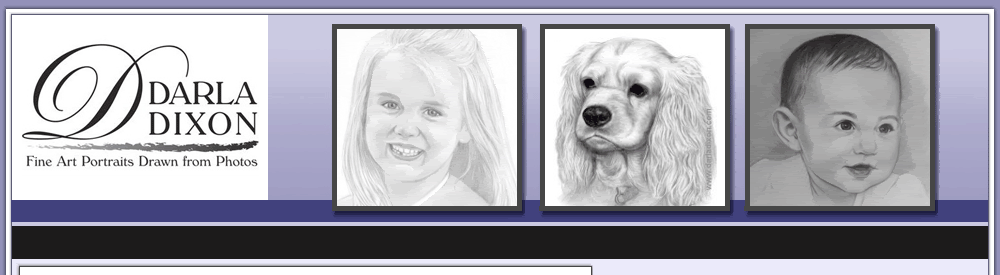
Darla Dixon
Portrait Art and Illustration
http://www.darladixon.com/
This article may be shared on the Internet as long as my name is mentioned as the author, and the website URL and information above is shared intact. Thank you!
how to draw hair
draw hair
draw fur
how to draw
draw in pencil
pencil drawing


No comments:
Post a Comment